How to create and manage tickets
Manage Tickets
- Sign In to Help Center.
https://help.nagatoshi.support/portal/en/home - Go to "My Area".
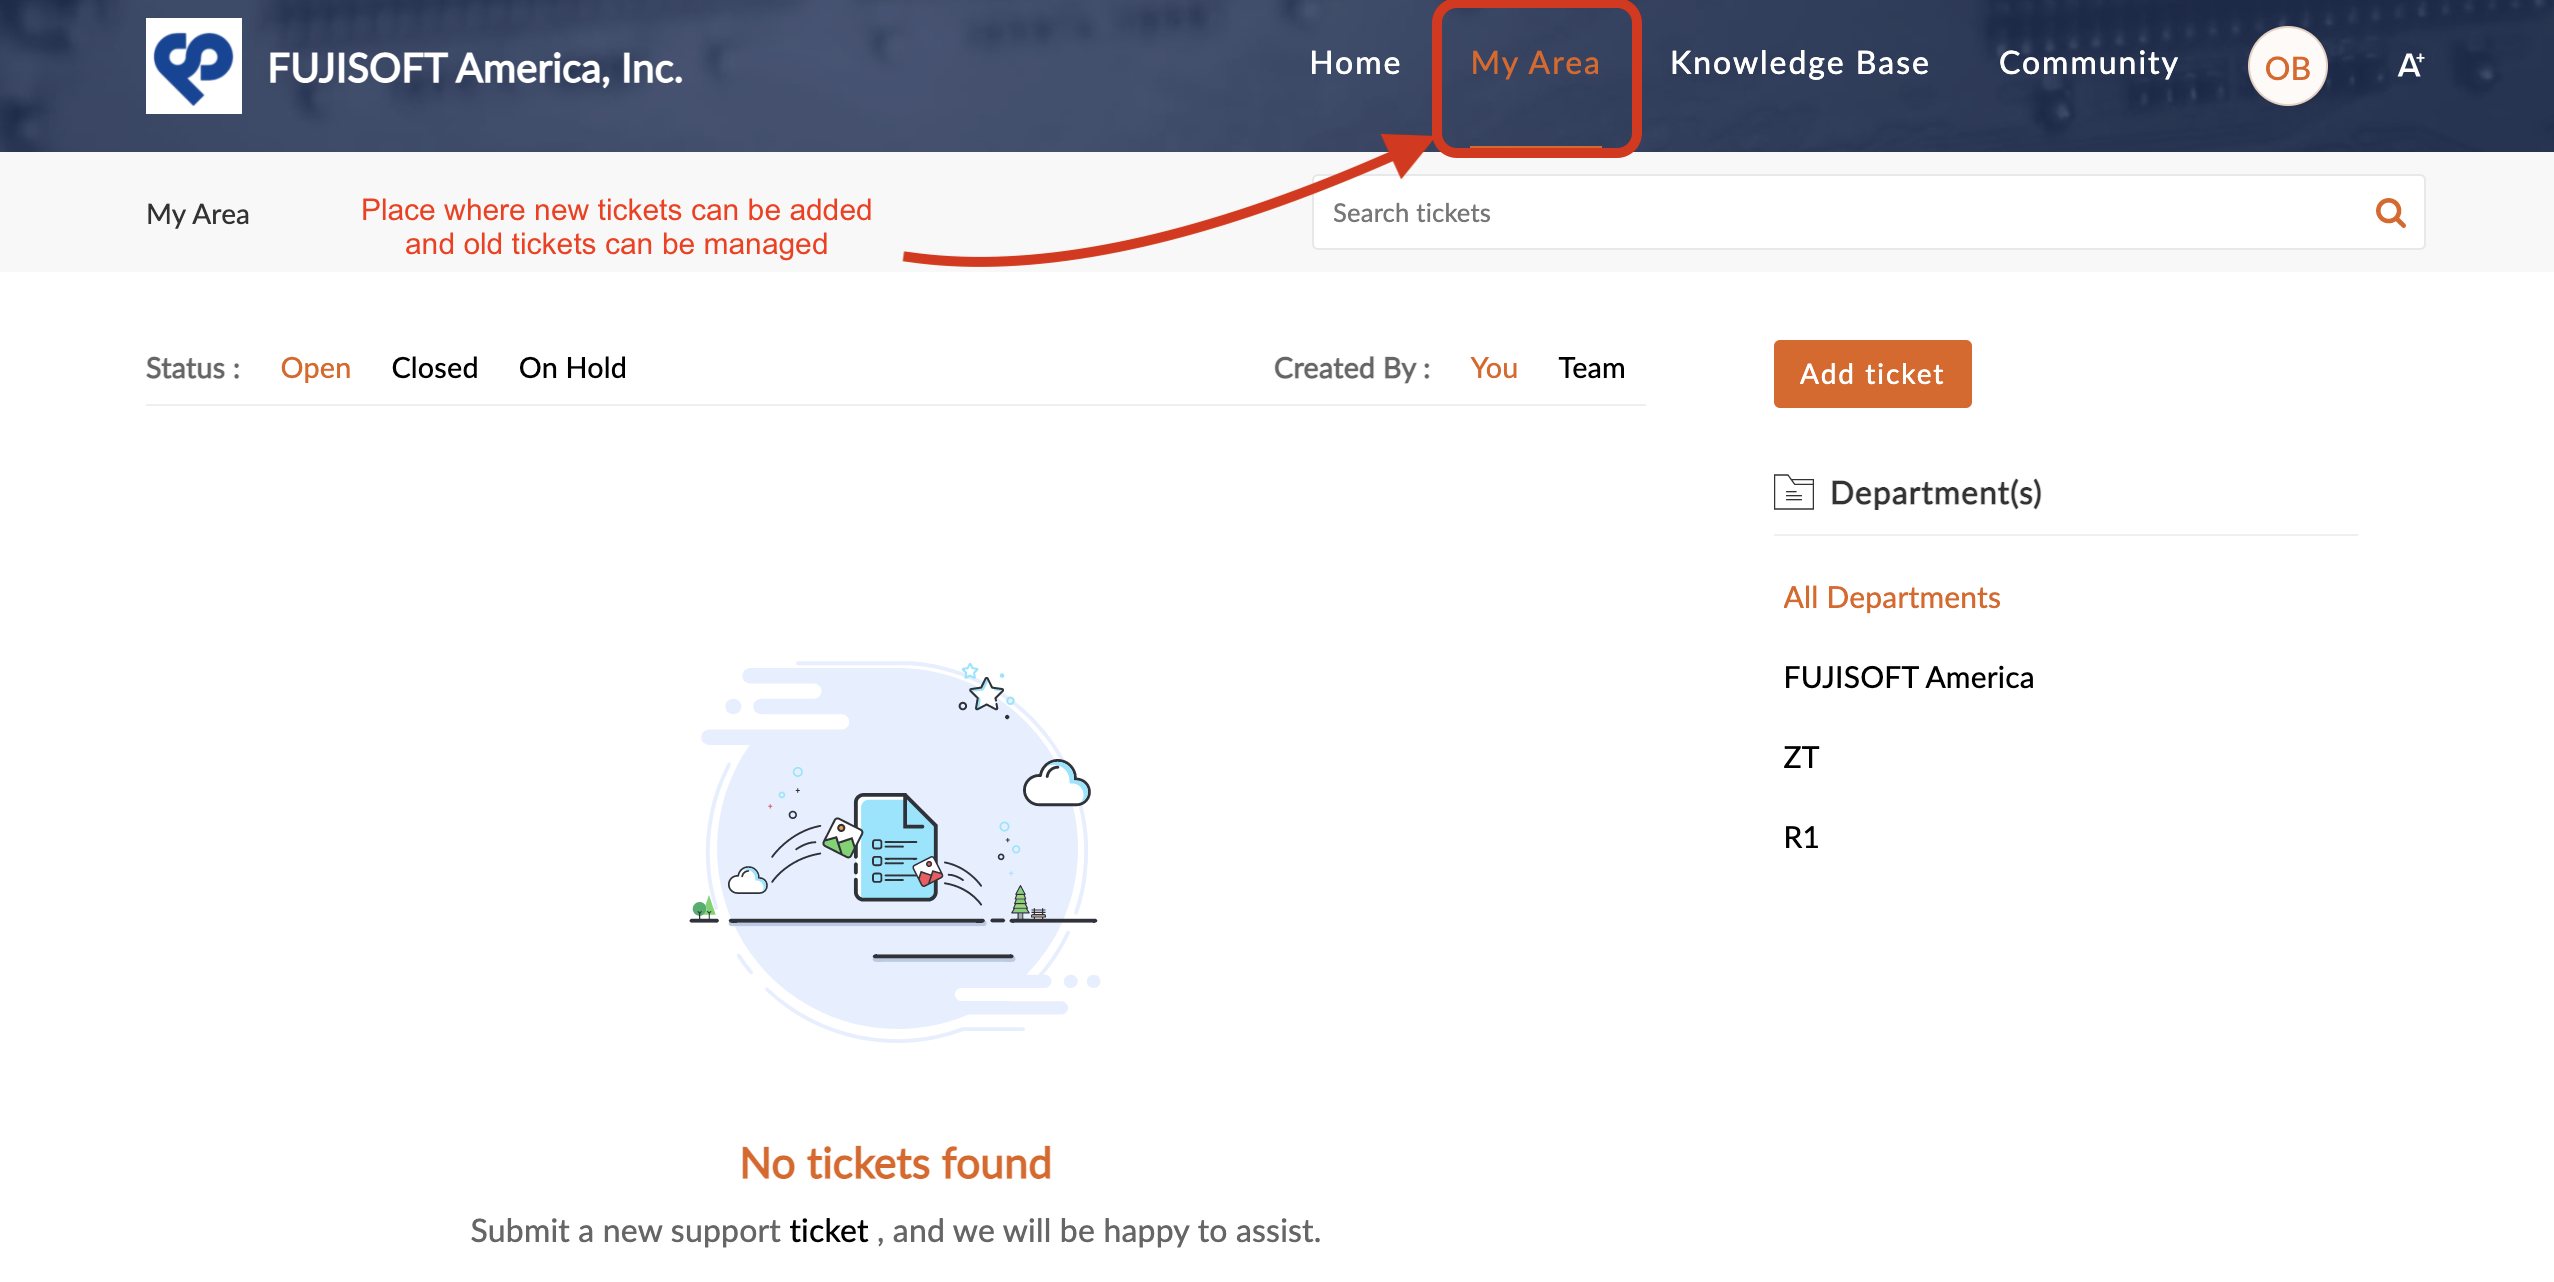
- Click your department name in the dropdown.
The tickets can be searched by entering keywords in the "Search field".
To see tickets related to your company: click the corresponded Department name on the right side. When the correct department is selected, existing tickets will be displayed.

Create a ticket from the Help Desk
- Sign In to Help Center.
https://help.nagatoshi.support/portal/en/home
- Go to "My Area".
- Click "Add Ticket" button.
add Subject and Description
set Priority
set Classifications
attach a file if necessary
click "Submit"

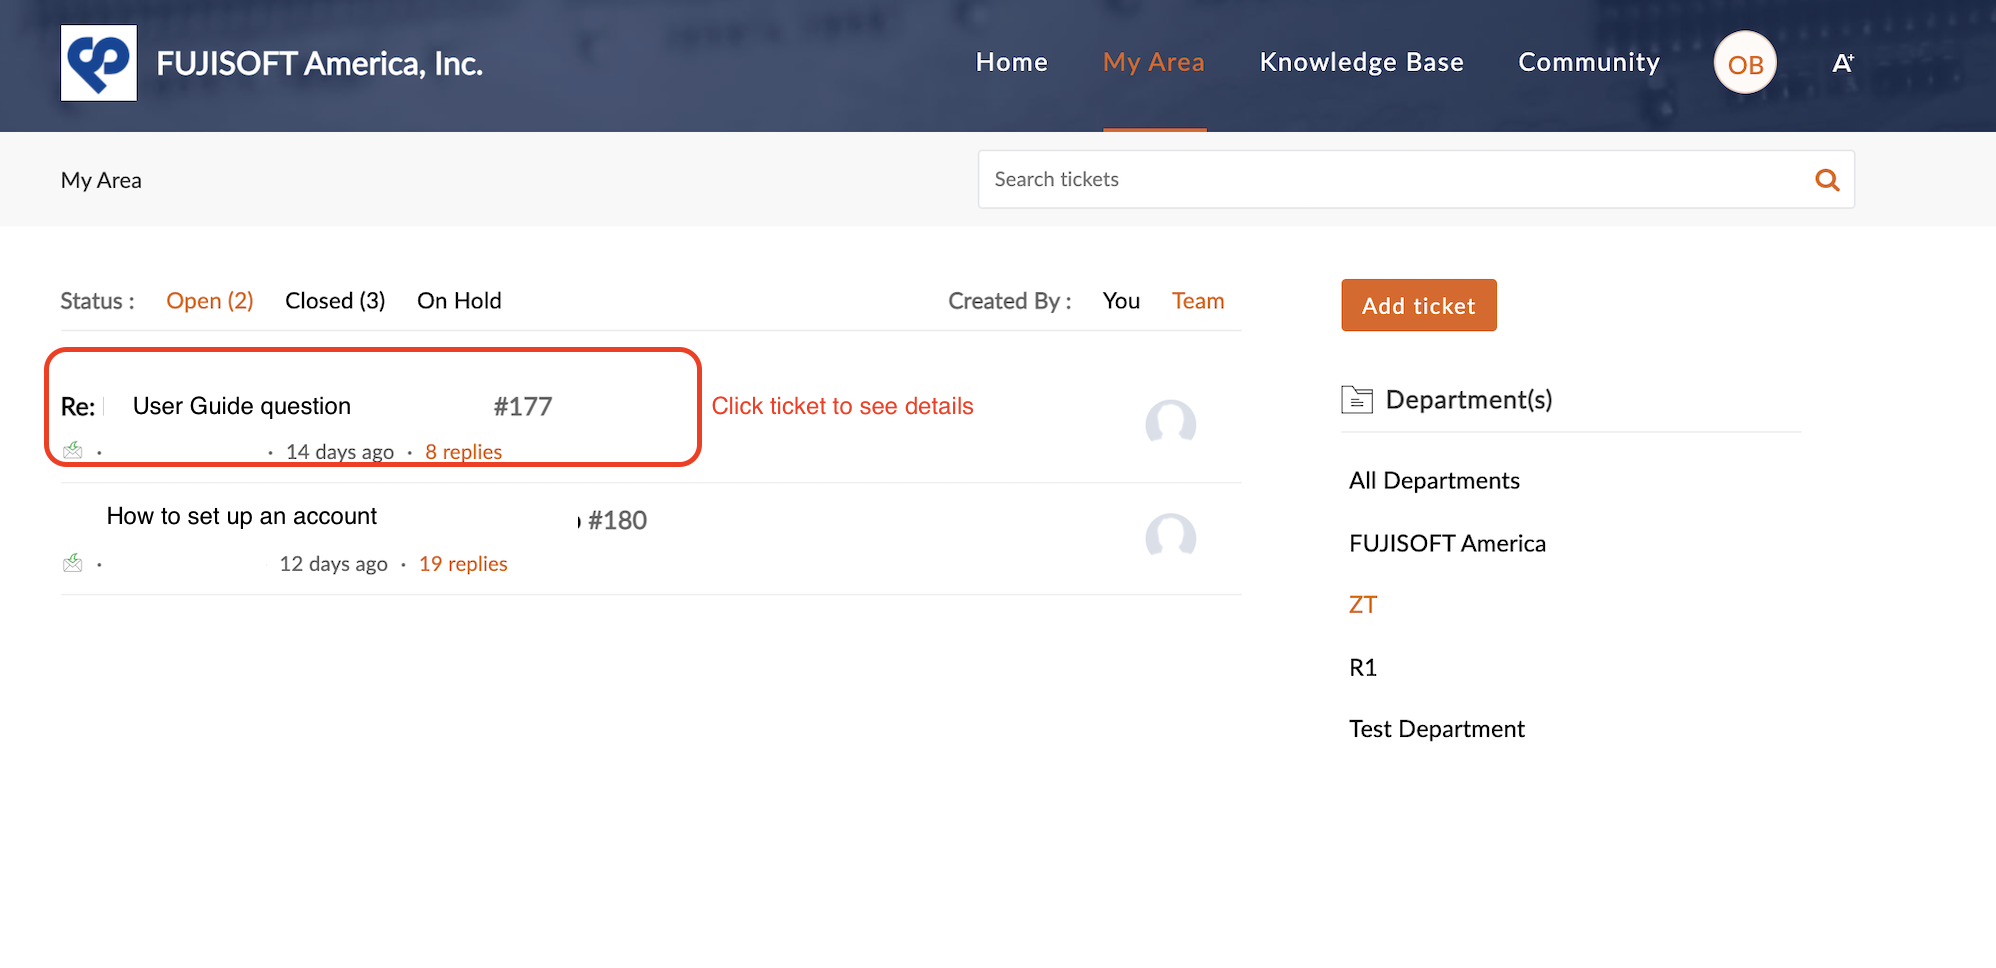
- To access existing/created ticket details go to My Area -> select corresponded department and click ticket.
Response from the Support Team and the whole conversation will be displayed in detail.
A comment can be added by clicking "Comment" .A reply can be added by clicking "Reply". Ticket information will be displayed on the right side.
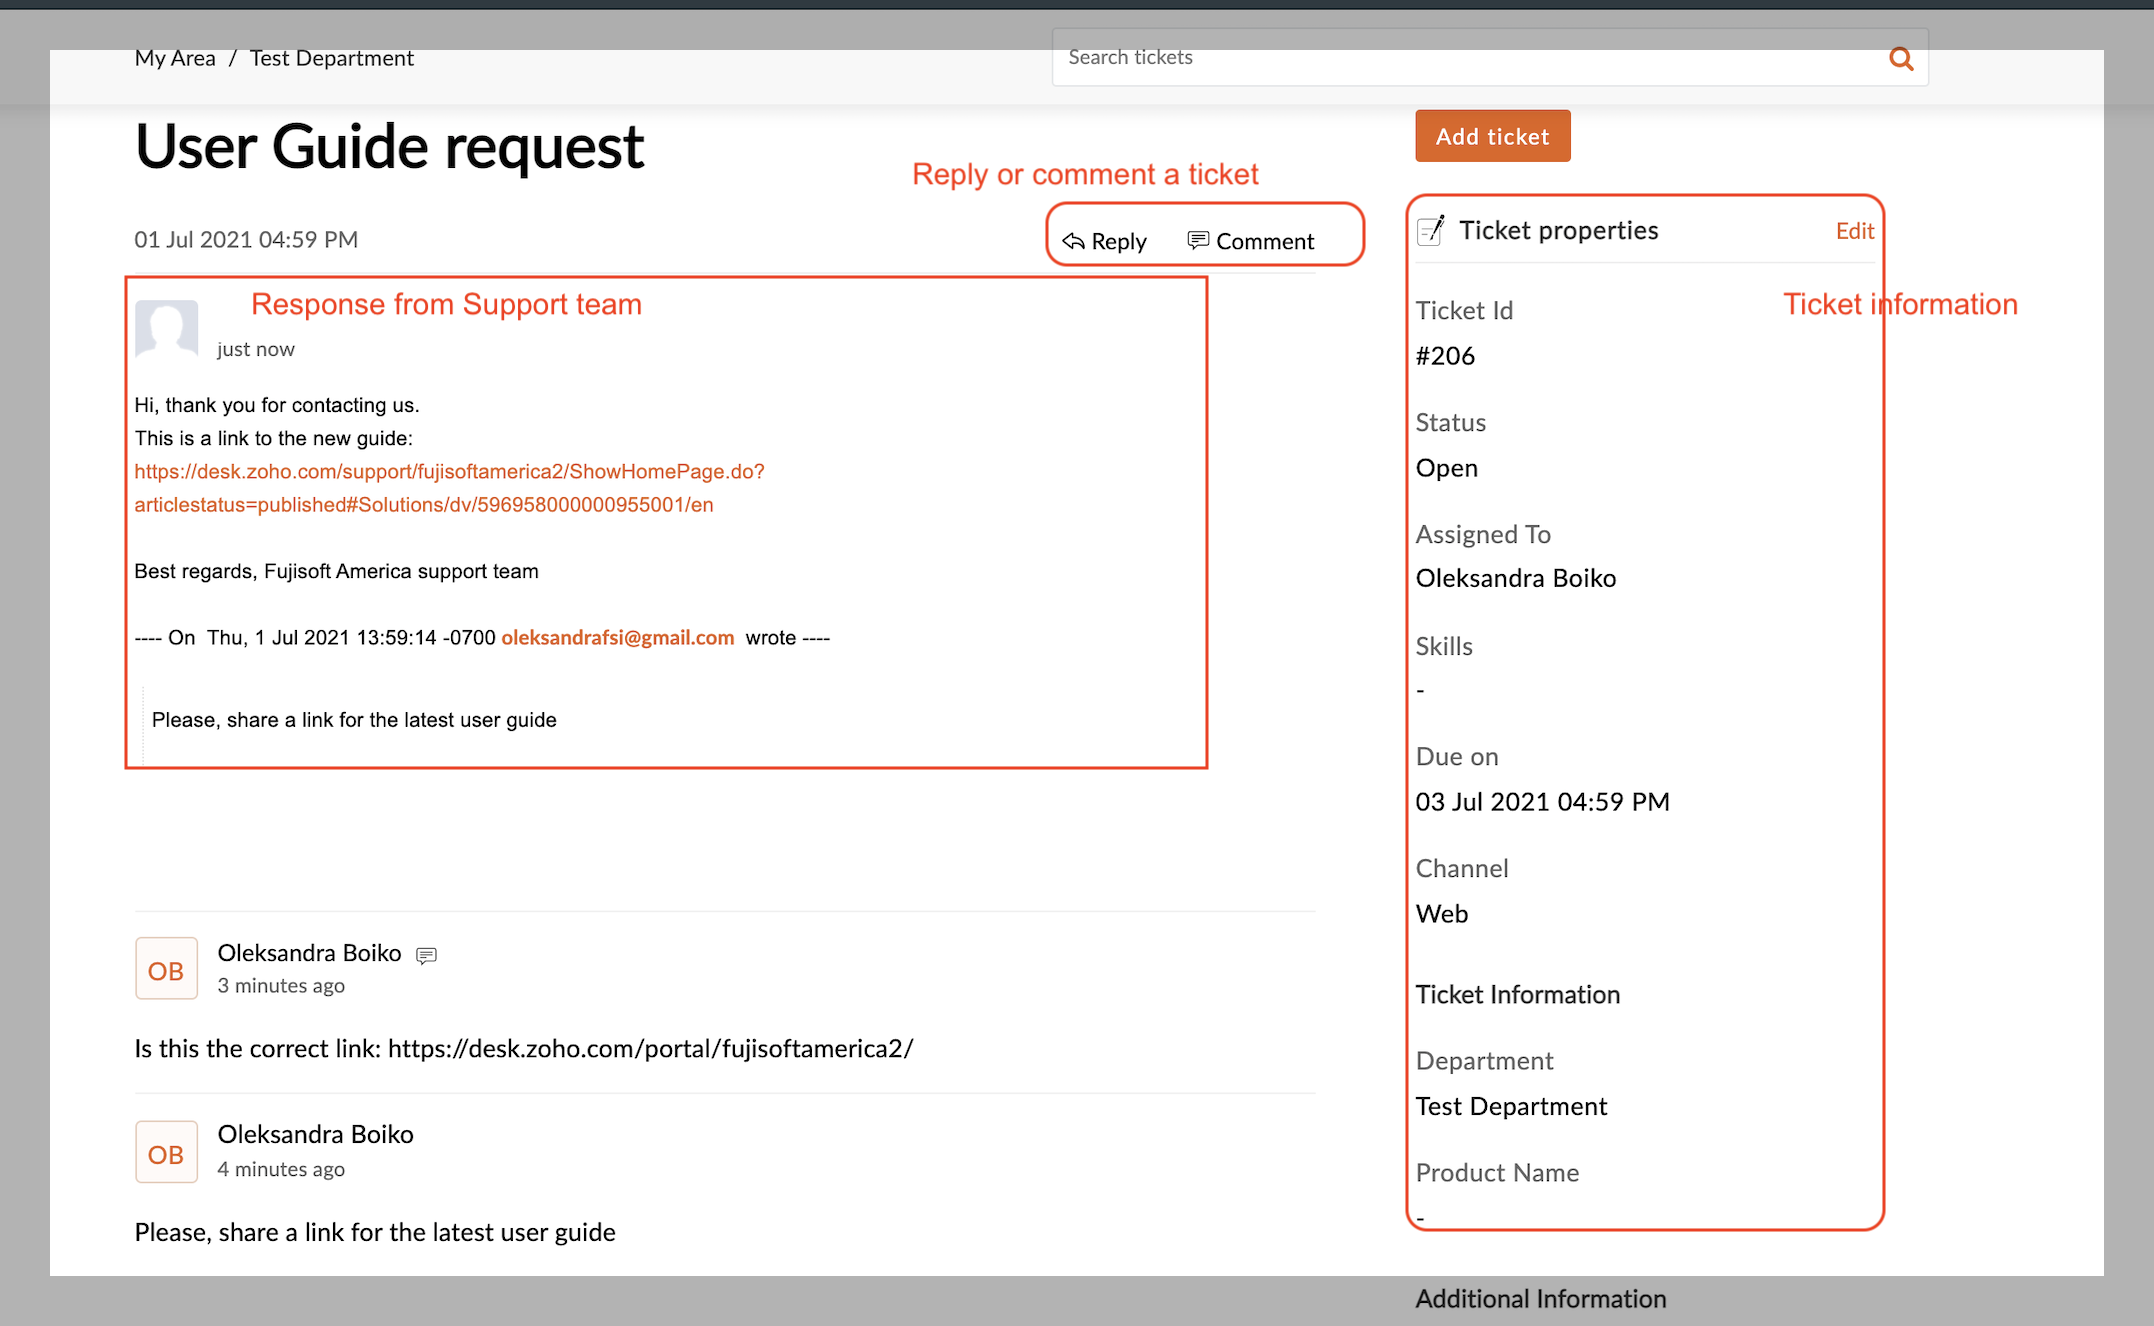
- When the issue is resolved, please click "Close ticket" button in the ticket information section.

Related Articles
Create or edit an Item
Items Items are either goods that you purchase from your vendors and sell to your customers, or, services that you provide for which you get paid. In Zoho Inventory, you can add these items with ease and manage their inventory such that, every time ...
Create Invoice/Package/Shipment
Create Invoice/Package/Shipment When SO is Confirmed and finalized: Go to Zoho Inventory -> select Sales Order Click “INVOICE/PACK/SHIP” button on the top panel. The new screen will be opened. The progress will be displayed. The price from the price ...
Create Invoice for Service Items
To create Invoice not related to SO with service items: Go to Zoho Inventory -> Sales -> Invoice. Click "New" on the top right or "plus" near Invoices. Type any value to alert field. It is better to add "service" to any other value you will be able ...
Create or edit a Vendor
Create a Vendor To add a new Vendor in Zoho Inventory: 1. Go to the Vendors module on the left side bar under the Purchases 2. Click "+" icon near the Vendors title or "New" button not he top right side 3. Enter required information Primary Contact ...
How to View Tickets
Sign In to Help Center. https://help.nagatoshi.support/portal/en/home Go to "My Area". Find the ticket through the following: - By sorting through Status - By sorting through who created the ticket - By sorting through Departments - By searching ...